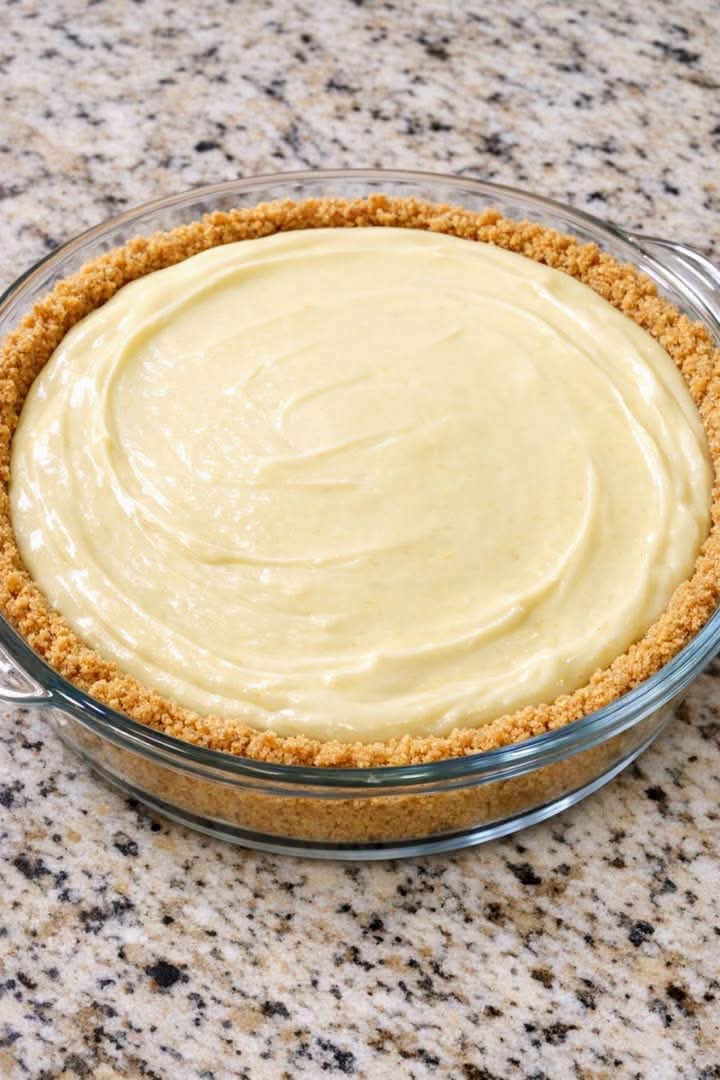
Here is a comprehensive, detailed exploration of the beautiful Classic No-Bake Cream Cheese Pie pictured in your image, complete with everything from its history to its nutritional profile and, of course, a detailed recipe.
Introduction
There is a certain nostalgic magic to a no-bake cream cheese pie. Picture this: a buttery, golden graham cracker crust cradling a cloud of velvety, sweet, and tangy cream cheese filling. Unlike its baked cousins, this pie relies on gentle chilling to set, resulting in a texture that is lighter than cheesecake but infinitely richer than a simple pudding. It is the ultimate “set it and forget it” dessert—perfect for hot summer days when turning on the oven is an absolute crime, or for busy weeknights when you need a show-stopping dessert without the fuss.
A Brief History
The concept of the “cream pie” dates back to the early 20th century in the United States, often utilizing milk, sugar, and eggs. However, the true evolution of this specific pie came with the mass commercial availability of cream cheese in the 1930s. The famous Philadelphia brand cream cheese popularized rich, tangy dairy spreads. In the mid-20th century, the “no-bake” dessert craze exploded, spurred on by the invention of instant pudding and pre-made graham cracker crumbs. Cooks discovered that combining softened cream cheese with sweetened condensed milk or whipped topping created a thick, stable filling that required zero baking—giving birth to the beloved American classic we know today.
Benefits of this Dessert
· Stress-Free: No water baths, no cracking, no precise oven temperatures. It is practically foolproof.
· Versatile: It can be adapted to any flavor profile—lemon, chocolate, strawberry, or classic vanilla.
· Cooling: It is a refreshing, cold dessert that aids in cooling down the palate after a heavy meal.
· Texture: It offers a luxurious, melt-in-your-mouth mouthfeel that satisfies creamy dessert cravings.
The Recipe: The Ultimate No-Bake Cream Cheese Pie
Preparation Time: 20 minutes (+ 4 hours chilling time)
Yields: 8 servings
Ingredients
For the Graham Cracker Crust:
· 1 ½ cups graham cracker crumbs (about 10-12 full sheets)
· ¼ cup granulated sugar
· 6 tablespoons (¾ stick) unsalted butter, melted
For the Cream Cheese Filling:
· 16 oz (2 packages) full-fat cream cheese, softened at room temperature
· 1 (14 oz) can sweetened condensed milk
· ¼ cup fresh lemon juice (adds tang and aids in setting)
· 1 ½ teaspoons pure vanilla extract
· 1 cup heavy whipping cream, very cold (optional for extra lightness, or use 8 oz Cool Whip)
Methods & Instructions
Step 1: Form the Crust
1. In a medium bowl, combine the graham cracker crumbs and ¼ cup sugar.
2. Pour the melted butter over the crumbs and mix thoroughly with a fork until the mixture resembles wet sand and holds together when pinched.
3. Press the mixture firmly into the bottom and up the sides of a 9-inch glass pie dish (as seen in your photo). Use the bottom of a measuring cup to get a flat, even base. Place the crust in the refrigerator to chill while you make the filling.
Step 2: Create the Filling
1. In a large mixing bowl, beat the softened cream cheese with an electric hand mixer (or stand mixer with paddle attachment) on medium speed until completely smooth and fluffy—about 2 minutes. Ensure there are no lumps!
2. Pour in the sweetened condensed milk and beat again until fully combined and smooth.
3. Add the lemon juice and vanilla extract. Mix until the mixture starts to thicken slightly.
4. (Optional but recommended) In a separate chilled bowl, whip the heavy cream until stiff peaks form. Gently fold the whipped cream into the cream cheese mixture with a rubber spatula. Alternatively, if using Cool Whip, fold it in now. Be gentle to keep the filling airy
Step 3: Assemble and Chill
1. Pour the cream cheese mixture into the chilled graham cracker crust.
2. Use an offset spatula or the back of a spoon to smooth the top. For the signature swirls seen in your image, lightly drag the back of a spoon in circular motions across the surface.
3. Cover the pie loosely with plastic wrap and refrigerate for at least 4 hours, but ideally overnight (8 hours). This allows the filling to set completely.
Nutrition Information (Per Serving – Approximate)
· Calories: ~540 kcal
· Fat: 36 g
· Saturated Fat: 22 g
· Carbohydrates: 46 g
· Sugar: 35 g
· Protein: 9 g
· Sodium: 380 mg
Please note: This is a rich, indulgent dessert and should be enjoyed in moderation.
Formation (The Science of Setting)
The “formation” of this pie relies on an emulsification reaction. The acidity from the lemon juice denatures the proteins in the cream cheese slightly, causing the mixture to thicken. When combined with the heavy cream or whipped topping, the air bubbles are trapped within the fat and protein matrix of the cream cheese. The chilled environment of the refrigerator firms up the butterfat in the cream cheese, locking that air in, which results in the solid, sliceable, yet creamy “mousse” texture you see in the image.
The Lovers (Who does this pie love?)
This dessert loves:
· The Busy Home Cook: The person who wants to impress their guests without breaking a sweat.
· The Summer Baker: Anyone avoiding turning on a hot oven in July.
· The Textural Purist: Those who prefer smooth, velvety textures over dense, heavy cakes.
· The Customizer: It loves toppings! Fresh berries, lemon curd, crushed cookies, or a chocolate drizzle are its best friends.
Conclusion
This No-Bake Cream Cheese Pie is a testament to the beauty of simplicity. It proves that you don’t need complicated techniques or expensive equipment to create a dessert that looks like it came from a high-end bakery (as beautifully shown in your picture). With its buttery base and silky, tangy crown, it is guaranteed to be a crowd-pleaser.
Final Tip for Perfection: Use full-fat cream cheese at room temperature—this is the single most important secret to avoiding a lumpy pie! Enjoy every blissful bite.