This is the Amish White Bread recipe, a classic homemade bread known for its soft, slightly sweet flavor and simple ingredients. Below, you’ll find everything from its origins to the final bake.
Introduction
Amish White Bread is a timeless, soft, and slightly sweet bread that originated within Amish communities in the United States. Known for its versatility, it’s the perfect accompaniment to soups, sandwiches, or simply toasted with butter and jam. Unlike many store-bought breads, this recipe relies on simple, wholesome ingredients to create a fluffy texture that stays fresh for days.
History
The recipe stems from the culinary traditions of the Amish, a group known for their simple, self-sufficient lifestyle and rejection of modern conveniences. In Amish kitchens, bread-making was a daily ritual, using basic staples like flour, yeast, and sugar. This particular white bread recipe has been passed down through generations and gained widespread popularity for being foolproof and producing bakery-quality loaves at home.
Benefits
While typically made with white flour, this homemade bread has several advantages:
· No Preservatives: You control exactly what goes into your food, avoiding the additives found in commercial bread.
· Customizable: It serves as a base for healthier variations; you can substitute half the white flour with whole wheat or add seeds for extra fiber.
· Therapeutic: The process of kneading and watching the dough rise is known to be a relaxing, mindfulness practice that relieves stress.
Lovers
This bread is beloved by home bakers who appreciate an easy, reliable recipe for daily use. It is also a favorite among families because the mild, sweet flavor appeals to both children and adults for school lunches and breakfast toast. Additionally, budget-conscious cooks love it because the ingredients are incredibly inexpensive compared to artisanal store-bought loaves.
Formation (How the Dough Comes Together)
The “formation” of this bread relies on the science of yeast. When you dissolve sugar in warm water and add yeast, the yeast “eats” the sugar, releasing carbon dioxide. This gas gets trapped by the gluten network you develop while kneading the flour, causing the dough to rise and become airy. The oil adds tenderness by shortening the gluten strands, resulting in that signature soft crumb.
Ingredients
· 2 cups warm water (110°F/45°C)
· 2/3 cup white sugar
· 1 ½ tablespoons active dry yeast (about 2 standard packets)
· 1 ½ teaspoons salt
· ¼ cup vegetable oil (or canola oil)
· 6 cups bread flour (all-purpose works, but bread flour is better)
Equipment Needed
· Large mixing bowl
· Wooden spoon or stand mixer with dough hook
· 2 loaf pans (9×5 inches)
· Clean kitchen towel or plastic wrap
· Cooling rack
Methods & Instructions
Step 1: Proof the Yeast
In a large bowl, dissolve the sugar in the warm water. Sprinkle the yeast over the top. Let it sit for about 5–10 minutes until the mixture becomes foamy and creamy. This proves the yeast is active.
Step 2: Make the Dough
Add the salt and vegetable oil to the yeast mixture. Gradually add the flour, one cup at a time, mixing until a shaggy dough forms.
Step 3: Knead
Turn the dough onto a lightly floured surface. Knead for about 6–8 minutes (or 5 minutes in a stand mixer) until the dough is smooth, elastic, and springs back when poked.
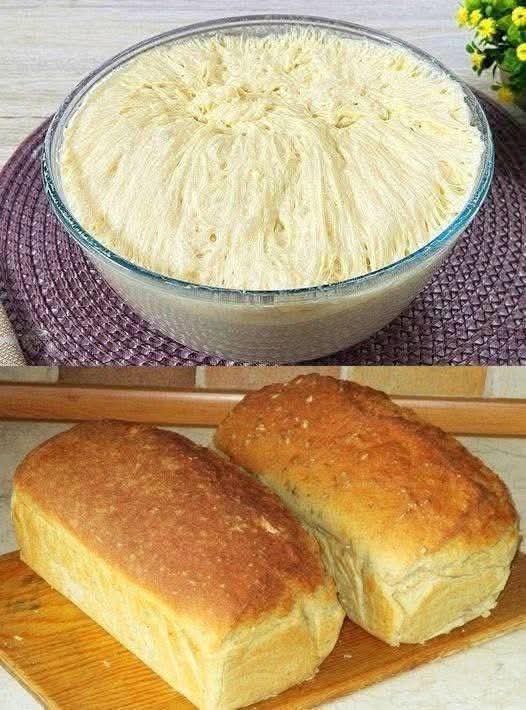
Step 4: First Rise
Lightly oil a large bowl. Place the dough in the bowl, turning it once to coat the surface in oil. Cover with a damp cloth or plastic wrap. Let it rise in a warm place until doubled in size, about 1 hour.
Step 5: Punch Down & Shape
Punch the dough down to release the air. Turn it onto a counter and knead gently for 1 minute. Divide the dough in half. Roll each half into a rectangle and roll it up tightly to form a loaf. Pinch the seams shut.
Step 6: Second Rise
Place the shaped loaves into greased 9×5 inch loaf pans. Cover and let rise again until the dough has risen about 1 inch above the rim of the pans, roughly 30 minutes.
Step 7: Bake
Preheat your oven to 350°F (175°C). Bake for 30 minutes, or until the tops are golden brown and the loaves sound hollow when tapped.
Step 8: Cool
Remove the bread from the pans immediately and transfer to a wire rack to cool completely before slicing.
Nutrition
The nutritional content varies slightly based on specific ingredients, but for one slice of this homemade bread (based on 18 slices per loaf), the averages are:
· Calories: ~120-170
· Carbohydrates: ~22-33g
· Protein: ~3-4g
· Fat: ~2-6g
· Fiber: ~1g
Conclusion
Amish White Bread is more than just a recipe; it is a comforting tradition that brings the warmth of a rustic kitchen into your home. With minimal effort and basic pantry staples, you can produce two beautiful loaves that taste infinitely better than anything from a plastic bag.
Lovers (Reprise)
Whether you are a beginner looking for a confidence boost or a seasoned baker seeking a fast, reliable white bread, this recipe consistently tops the charts. It is particularly adored by those who love the aroma of baking bread filling their house and the satisfaction of slicing into a warm, homemade loaf.