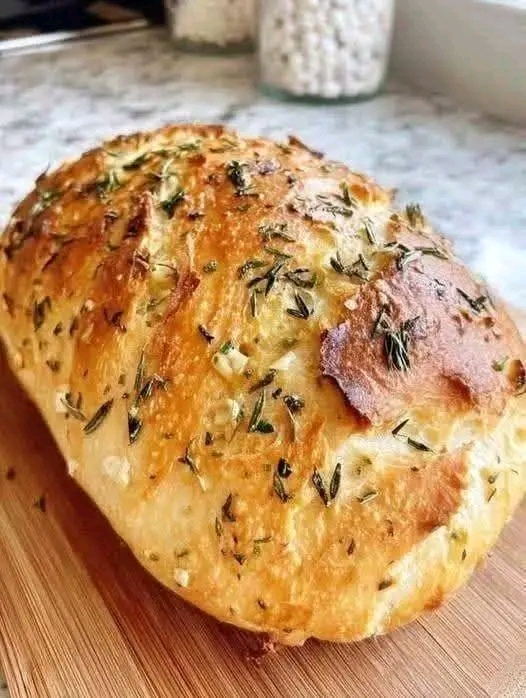
- Easy No-Knead Homemade Bread
Introduction
I don’t buy bread anymore! This easy homemade loaf requires no kneading, no eggs, and no butter. With a few inexpensive pantry staples and very little hands-on work, you can make fresh bread with a crisp golden crust and a soft, chewy center.
It is an excellent everyday bread for sandwiches, toast, breakfast, or serving alongside soups and stews.
Makes: 1 large loaf
Prep Time: 10 minutes
Rise Time: 1½–2 hours
Baking Time: 35–40 minutes
Difficulty: Easy
Origin
No-knead bread is a modern home-baking approach built around an old principle: allowing time to develop the dough instead of relying on extensive kneading. A long resting period lets the flour hydrate and the yeast ferment, naturally strengthening the dough.
This style became especially popular because it makes homemade bread approachable, inexpensive, and relatively hands-off.
Cultural Significance
Bread is one of the world’s most universal foods, appearing in countless cuisines and cultures. Homemade bread has traditionally represented hospitality, nourishment, and resourceful cooking.
A simple no-knead loaf continues that tradition while making bread baking accessible to beginners and busy home cooks.
Ingredients Quantity
– 500 g all-purpose flour or bread flour
– 350 ml warm water
– 7 g active dry yeast
– 1½ teaspoons salt
– 1 teaspoon sugar or honey
– 1 tablespoon olive oil, optional
– Extra flour for shaping
Optional Additions
Give your loaf a different flavor by adding:
– 1 teaspoon dried oregano
– 1 teaspoon dried rosemary
– 2 minced garlic cloves
– 2 tablespoons sesame seeds
– 2 tablespoons sunflower seeds
– 1 tablespoon flaxseed
– 50 g grated Parmesan
– 1 teaspoon dried thyme
– A sprinkle of sesame or poppy seeds on top
Tips for Success
Keep the dough slightly sticky: Don’t add excessive flour. A soft, slightly sticky dough generally produces a lighter loaf.
Use warm water: The water should feel comfortably warm rather than hot.
Give it time to rise: The yeast needs sufficient time to create air and structure in the dough.
Don’t knead: Simply mix until there are no obvious dry patches. The resting period does the work.
Preheat the oven thoroughly: A hot oven gives the loaf a better initial rise and helps create a crisp crust.
Cool before slicing: Let the bread cool for at least 20–30 minutes so the crumb can finish setting.
Instructions
1. Prepare the Yeast
Pour the warm water into a large mixing bowl. Add the yeast and sugar or honey.
Stir gently and allow the mixture to stand for about 5–10 minutes, until slightly foamy.
2. Make the Dough
Add the flour and salt. Pour in the olive oil if using.
Mix everything together with a wooden spoon until a rough, sticky dough forms. There is no need to knead.
Cover the bowl with a clean kitchen towel or plastic wrap.
3. Let the Dough Rise
Leave the dough in a warm, draft-free place for approximately 1½–2 hours, or until it has roughly doubled in volume.
For deeper flavor, the dough can instead be refrigerated and allowed to rise slowly for several hours or overnight.
4. Shape the Loaf
Lightly flour your work surface.
Turn the dough onto the surface and gently shape it into a round or oval loaf. Avoid pressing out all the air.
Place it on parchment paper or into a lightly greased baking vessel.
5. Bake
Preheat the oven to 220°C (425°F).
Make one or two shallow cuts across the top of the loaf with a sharp knife.
Bake for approximately 35–40 minutes, until deeply golden and the loaf sounds hollow when tapped underneath.
For a particularly crisp crust, bake it in a covered Dutch oven for the first 20–25 minutes, then uncover and finish baking.
6. Cool and Serve
Transfer the bread to a wire rack and let it cool for at least 20–30 minutes before slicing.
Serve fresh with your favorite toppings or alongside your favorite meal.
Description
This no-knead homemade bread has a beautifully golden, crisp crust and a soft, satisfying interior. The loaf has a simple, mildly savory flavor that works equally well for sandwiches, toast, or dipping into soups and sauces.
The recipe is especially appealing because it avoids eggs and butter and requires almost no hands-on preparation.
Nutritional Information
Approximate nutrition per serving, assuming 10 slices:
– Calories: 190–210 kcal
– Protein: 5–6 g
– Carbohydrates: 37–40 g
– Fat: 1–3 g
– Fiber: 1–2 g
– Sugar: Less than 2 g
– Sodium: Approximately 300–350 mg
Actual values vary depending on the flour and optional ingredients used.
Conclusion
This easy no-knead bread is proof that making bread at home doesn’t have to be complicated. There is no kneading, no eggs, no butter, and no expensive equipment required.
With just a little patience while the dough rises, you can enjoy a fresh homemade loaf that is economical, versatile, and wonderfully satisfying.
Recommendation
Use slices for sandwiches, toast them for breakfast, or serve the bread warm with soups, stews, pasta, or roasted vegetables.
For extra flavor, brush warm slices with olive oil and sprinkle them with herbs and a little salt.
Embracing Healthful Indulgence
Homemade bread allows you to control exactly what goes into your loaf. For additional fiber, replace part of the white flour with whole-wheat flour. Seeds such as flax, sunflower, or sesame can also add texture and nutritional variety.
While bread is naturally carbohydrate-rich, pairing a slice with protein, vegetables, eggs, cheese, or another nourishing topping can make it part of a satisfying balanced meal.
Sometimes the most enjoyable food is simply fresh bread made at home, shared around the table and enjoyed mindfully.